
For this project, I will tell you what I purchased, which is actually much more than I actually used. From the directions, you can tell that you need MUCH LESS fabric than what the supply list calls for. If you have smaller scraps, that would work perfectly!
Supplies:
~ 2 fat quarters, or large scraps, in coordinating reds
~ 2 fat quarters, or large scraps, in coordinating pinks
~ Backing fabric - 9x11 piece (half of a fq works perfectly)
~ Binding fabric - width of fabric (WOF) x 2" (mine equaled 44"x2")
~ Batting of your choice - size to match backing
~ Red thread - I used Guterman 100% polyester as it is the perfect color for both matching the reds and contrasting on the pinks
~ GO! Cutter - (not a necessity)
~ King of Hearts Go! cutter die (not a necessity)
~ Scraps of Pellon 805 Wonder-Under transfer web - or your fusible of choice
~ Scraps of tear-away stabilizer for appliquéing the hearts onto the background fabric (I believe the type I used is Sulky "Tear Easy," but I buy it by the yard and there is no label)
Instructions:
~ Back pink fabrics with fusible so that the fusible is cut with your fabric when run through the Go! cutter.
~ Run those 2 layers through your cutter.
OR, cut out 2 larger hearts and 2 smaller hearts from backed fabric if you do not have a die cutter.

~ Cut a 8.75" x 8" strip from your 2 red fabrics, then cut the 8" side in half to make 2 rectangles that are 8.75" x 4".

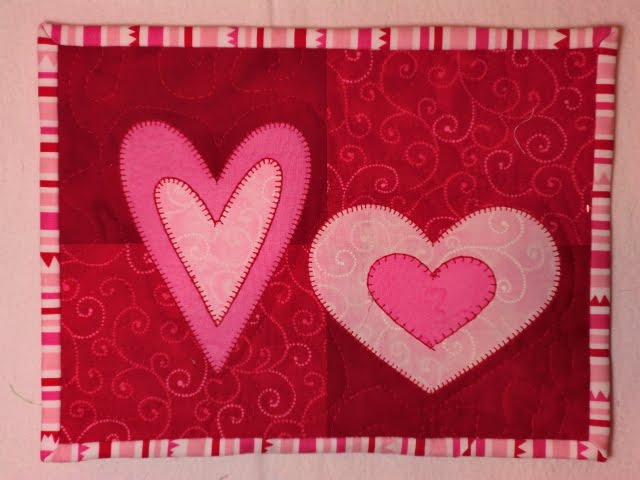
~ Sew the rectangles together, pressing seams open in the back, to look like the following:
NOTE: seams look gorgeous on the back when pressed open (!!), but you can press to your liking.


~ Peel off paper backing from your 2 smaller heart pieces (You will need a total of 2 large and 2 small hearts in one of each pink fabric). Test out how you'd like the inside hearts to look - do you want them straight on like the top 2 hearts, or do you want them "wonky" like the bottom two?

~ Iron the smaller hearts on top of the larger hearts with the opposite fabrics.
~ After the smaller hearts are in place, remove the paper backing from the larger hearts and lay them down on your background in a way that is pleasing to your eyes. I try a few looks and photograph them so I can see a different perspective. When it is to your liking, iron the large hearts down.

~ Back your mug rug top with the Tear Easy stabilizer making sure to cover the area where the hearts are located.

~ Test your appliqué stitch to make sure it is to your liking (I like to use a small/narrow button hole stitch for smaller appliqué pieces - on my Janome, it is a 3.0 length) and appliqué all 4 hearts using your preferred appliqué method. When I start each new heart, I like to start with both threads coming to the top. Then when the appliqué is complete, I take all 4 threads with a hand sewing needle and bring them to the back. This just prevents a mini bird's nest of thread on the back, which is just my preference.
NOTE: make sure NOT to iron the Tear Easy - it will melt on your project!!

~ Now that you've finished the appliqué, your "top" is done! (This is the point where I have to put myself on restriction to my sewing room so that I don't set the top aside for the next 6 years...)
~ Sandwich the top, backing and batting and free-motion quilt (fmq) the the mug rug. I'm working on getting more fmq practice! Otherwise, you really do not need a lot of "quilting" to stabilize your layers in this small of a project. You could simply outline your hearts 1/4" away and then stitch in the ditch of your background rectangles, and that would probably suffice.


~ After quilting, I trim the batting and background to the edges of the mug-rug, then check to make sure the dimensions look nice.

On this project, I felt there was too much "empty space" above and below my hearts, so I trimmed 3/8" off both the top and bottom edges. The mug rug top is now 9" x 6.75". When bound, I think this will look perfect!

~ Bind quilt using your favorite/preferred method.
~ Wa-LA! You're done! Congratulations and Happy Valentine's Day!
~~~~~~~~~~~~~~~~~~~~~~~~~~~~~~~~~~~~~~~~~~~~~~~~~~~~~~~~~~~~~~~~~~~~~~~~~~~~~~~~~~~
Melissa asked her bloggers to answer a few questions for her post. I liked the questions, so I'm going to include them here:
1. What got you hooked on your craft of choice?
I was originally "introduced" to quilting by my Aunt Jean. I never realized that "people" make quilts, that it isn't just some big manufacturing thing to make "blankets" that are sold in stores. I was in love with the idea and made a super-hilarious first quilt that we still use today. In 2000, I was introduced to Carol (who would later introduce me to her brother and would become my sister-in-law - fairly quickly!), and took some classes from her. At that point, I was truly hooked!! And in love...
2. What lights your crafting fire (i.e.: what keeps you crafting, why do you do it?)?
I love love LOVE bright colors. They keep me happy and keep my mood fairly upbeat. I also love to create something that I will use in daily life. I love it when someone says "oh, that's really nice," and I can say "Thanks so much - I made that!" It makes me feel really good.
3. What is your favorite Valentine’s themed junk food?
Oh my! I've never really thought about this holiday for junk food. I'd have to say that I LOVE See's Candy "creams," and milk chocolate.
1 comment:
I love you mug rug! It is so darling! I am SEW happy to get to feature you!
Post a Comment